


We will show you Mailchimp email subscription from WordPress step-by-step process. Let’s say, for example, that you’ve created an e-commerce site and are trying to capture your customers’ emails. You can do that by adding a Mailchimp sign-up to your website and collecting their emails right there. This is what we call an email list in marketing terminology. Once you have this email list, you can use it as a lead magnet or other powerful marketing tools like autoresponders, drip campaigns, etc.
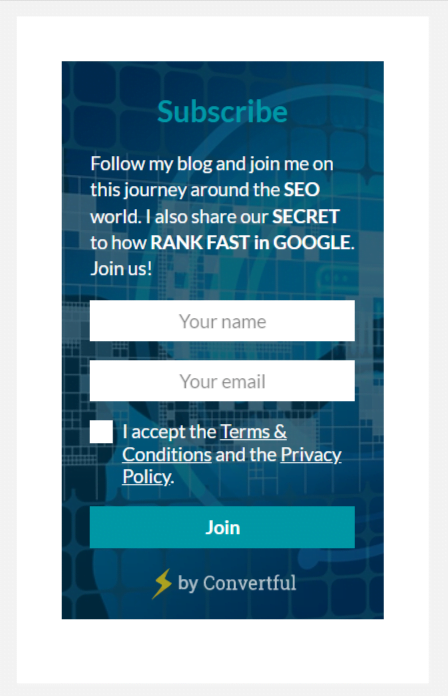
Mailchimp Email Signup Form WordPress
Let’s add our Mailchimp email subscription from WordPress in easy steps.
Step One
Visit the convertful website, and you need to click the “Try Free” button, which is on the top right of your screen. Clicking the button, you will see a pricing page with three different plans available. Choose whether you want to use Convertful for one month or subscribe for six months or a year. You have a free account option in Convertful. You will be sent an email containing a verification code. Open the email and copy the code into the text box in the Convertful dashboard, then click on “Verify Now” at the bottom of your browser. Once you’re verified, you can add your domain name and select a site platform. Once you have added your site, you will need to connect to WordPress. Now login to WordPress’s admin dashboard and install the Convertful plugin.
Step Two
Step 2: Install Convertful Subscription WordPress Plugin
After adding the site now, you have to install and activate the convertful plugin. Go to the dashboard of WordPress and then go to plugin and ==> Add New and search for Convertful. Install and activate the mailchimp plugin from the directory to use it.
After activating the convertful plugin, now go to Tools==> and Convertful Menu in the WordPress Admin Panel and click the connect button.
You will be redirected to the Connect Site page. Check your domain to ensure it is valid and click Approve. After completing these steps, you will connect the website with Convertful.

Step Three
Add the subscription form you want to add to your site. Click on the Create widget button, and you will find different templates.
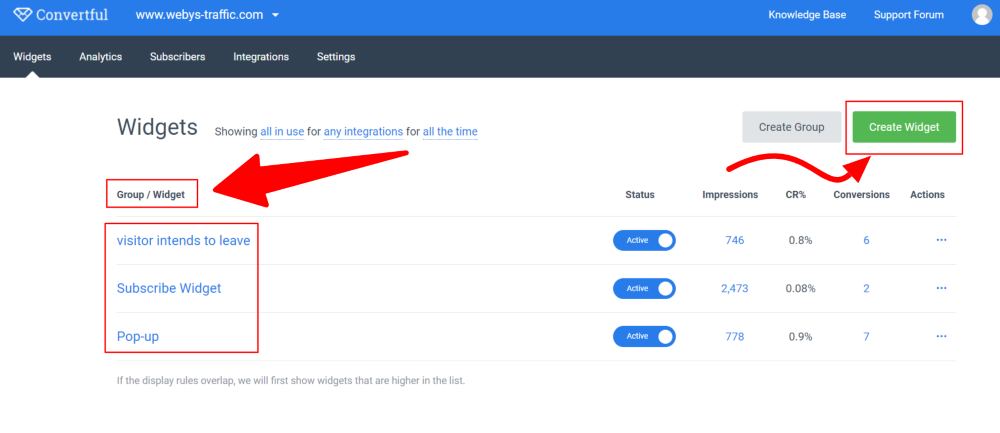
Now you can add your website to create a pop-up form on your site. Just click the “Pop-ups” tab, and you’ll find different types of pop-up forms which you can add to your site. Select the form you like now; if you click on a form, you will see a preview of how it’ll look on your website.
To pick a form, click the button Create Pop-up, and you will see that you may have the form. Now we are going to see who can edit the form.
To change the image, click on it and then click ‘change’ and drag an image from your computer to the place where you want to insert it. You will see that the inserted image changes into another image.
If you wish to change the text, click on it and enter your desired text. Changing any text in your form is relatively easy.
If you’d like to change the text on the button, click it, enter your text and click “update.” That’s how we edit the form.
Step Four Create MailChimp Account
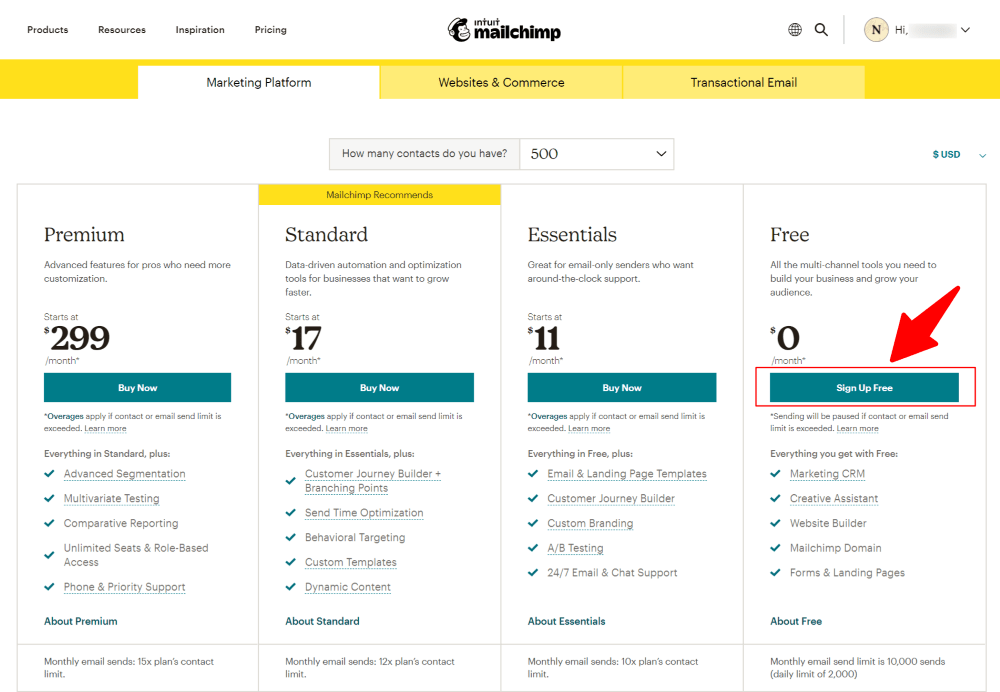
Go to the MailChimp website. Click on the “Get MailChimp” button and sign up for a free account with your email address and password.
Step Five Integrate Mailchimp
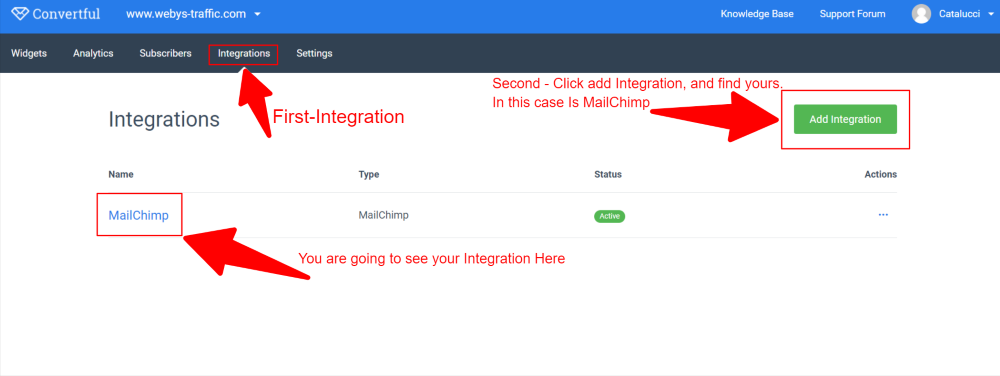
We will add MailChimp to our WordPress site using an app called Convertful. We need to go to our Convertful dashboard, click on the Integrations button on top, and select Mailchimp.
Now click the Connect button.
Final Step
Adding the form to your website is to choose when you want to display your form on the website. So to decide when you want to show the form, let’s go to display rules, and here you will see different options for displaying your form.
Suppose you want to exhibit your form when the visitors start Scrolls down. You need to enable the scrolling option. Now click Save Changes.
And then enable the button now; as soon as you allow it, add the email subscription form to your website. So to check that, let’s go to our website, and now if you scroll down, you will see that we have got our form.
So now you have successfully added our email subscription form to your website, and now your visitors can subscribe to your website using this form.
How This Form Works
When the visitor enters their name and email and clicks on the “Submit” button, they will be saved in our Convertful account, which we can use or send them confirmation mail through MailChimp for later use. If we have subscribers, we will look at how to send them an email through Convertful. We will discuss three different steps.
We need an email provider to send an email to our subscribers. For this purpose, we will discuss how to set up the email provider.
Step First Setup Mailchimp Account
First, set up an account on MailChimp. To create an account, open a new tab go to MailChimp.com, and press enter. Now click Sign up For Free, fill in these details, and click Get Started. As you can see, MailChimp gives us a free plan that lets us send emails to up to two thousand subscribers. Let’s select it and click Complete Now to finish creating your account.
You need to enter details, so enter the website name and join your website’s URL. We have successfully created our MailChimp account now. Once you have completed your MailChimp account, how do you connect it with Convertful?
Step two Sending Emails to Subscribers.
To connect MailChimp with Convertful, log in to your Convertful site and go to Integrations > Add integration. Click the MailChimp add-on. Directly to connect Convertful with MailChimp, you need to log in to your MailChimp account. Please enter your credentials “username and password” and click login, and now we have successfully connected our MailChimp account with Convertful.
Step Three Disable Confirmation Email
Disable the confirmation email for your subscribers. By default, visitors will receive an email if they subscribe to your site. When they click to confirm, they’ll be subscribed to your email list to avoid this confirmation email and subscribe immediately after clicking Subscribe; you need to disable this option.
Let’s disable this and click Save Changes, so now we have successfully disabled the confirmation email. And we have connected MailChimp with Convertful, and now we can start sending emails to our subscribers.
Conclusion
We have introduced some of the most valuable points associated with an online Mailchimp email subscription from WordPress, which we hope will help you better understand how this service works. Now that you’ve learned how to integrate a MailChimp email subscription form into your WordPress site, it’s time to try it out and see how well it functions. MailChimp is well-known for the high-quality templates they offer, so you can feel more than confident in setting up an email subscription form on your website. The benefits of adding email subscriptions are abundant. You will interact with customers and give them access to exclusive deals and instructions on how to use your products or services.