Table of Contents
ToggleHave you been getting ideas for designing a post or adorning your work presentation? Well, our creative minds are never short of throwing innovative designs. But we can’t really implement them the way we want to unless we do it ourselves! Wondering how to “professionally” Canva Design a post by yourself? All you need is one graphic designing platform, Canva design.
You must have heard of Canva if you’ve been exploring the world of digital marketing, content, and SEO. Canva is an online platform for graphic design. The website allows you to create endless types of designs across different platforms.
They include posts for your social media accounts (Facebook & Instagram), infographics for e-commerce sites, study & work presentations, resumes, research documents, and a lot more. All these Canva designs are readily available in templates without any cost! Yeah, you heard that right!
Let’s dissect a bit more about Canva before we get to the query, “how does Canva work?”
Canva Features at a Glance
These are the features of this free, simple & easy to use graphic designing platform:
- Default & pre-sized images for social media: Create engaging Facebook & Instagram posts.
- Customizable designer templates: Find what you need from over 250,000 templates for 100+ design types.
- Resizing & Reshaping Options: Customize the templates in whatever shape, size, font, and colors you prefer.
- Business Templates: Create resumes, work presentations, marketing proposals, mind maps, Canva logos, and whiteboards like a pro!
- Images Drafting: Save as many images as you want in the gigantic 5B cloud storage and download them whenever you need them.
- Canva for Education: Explore a whole new world of educational templates, essentially for the K12 teachers & students.
- Canva for Blogging: Design attractive banners, quote articles, create infographics, and a lot more for your blogs using Canva design.
This whole deal of features is on the free version of Canva. All you need to do is register your account using Google, Facebook, or simply any email address.
We’re primarily focusing on the free version of Canva in this article which is pretty easy to use. But we’ve also briefly discussed the privileges you will get if you sign up for Canva Pro, i.e., the paid version. Also, a brief take on “How much is Canva Pro?”
How to Use Canva – The Complete Guide to Using Canva for Social Media Posts
Canva offers a lot of customizable templates for social media posts, briefly including:
- Instagram & Facebook marketing posts for your brand (flyers, brochures, Canva logo, etc)
- Stories & status posts
- Twitter posts
- YouTube thumbnails
- Background for social media reels
- Pinterest pins
- LinkedIn banners
- Social media infographics
Creating posts on Canva is simple & easy because Canva breaks down each creation into chunks. It deals with all the parts in one entire post individually, based on image, text, graphics, and color elements. Here’s a step-by-step guide to creating a social media post design on Canva:
Step 1: Sign Up and Get Started
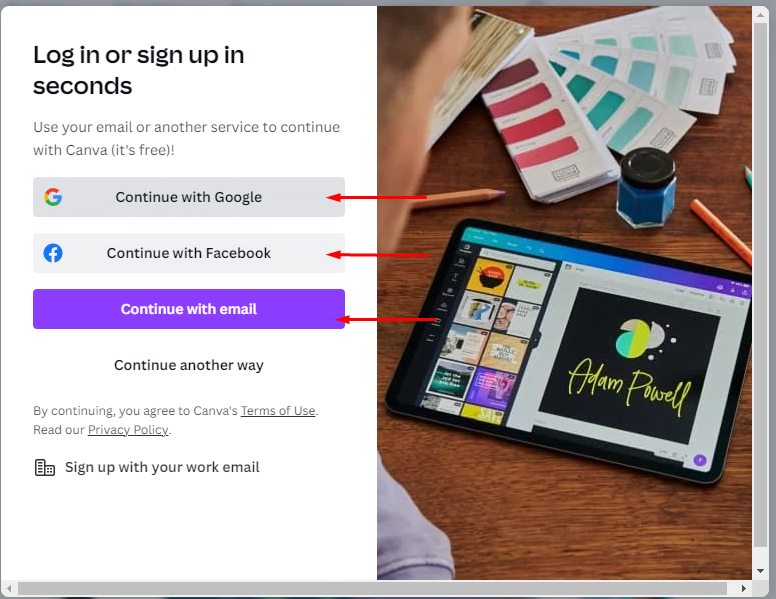
Simply log on to canva.com and click “sign up for free”, and proceed to sign up on Canva using your existing Facebook, Gmail, or any Email address. After signing up, click on the “All Templates” section to expand it.
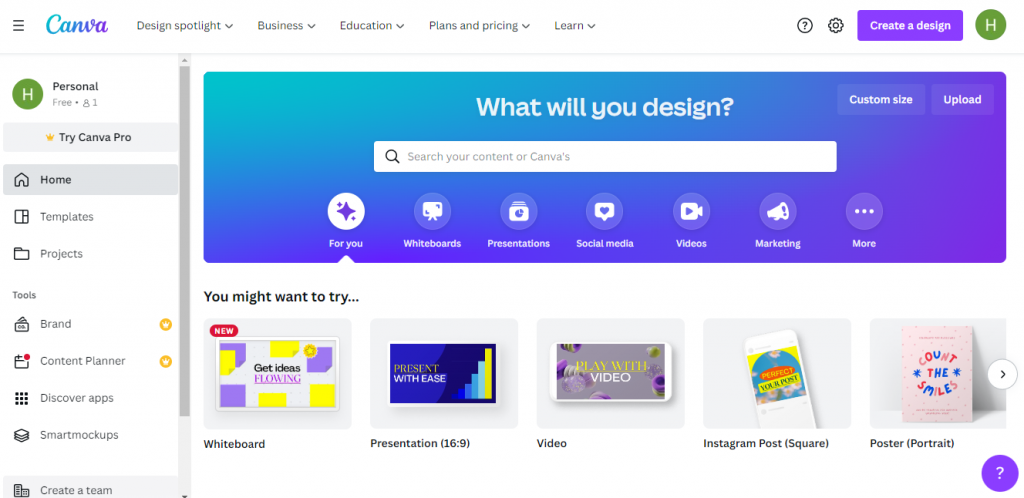
Step 2: Choosing the Relevant Template
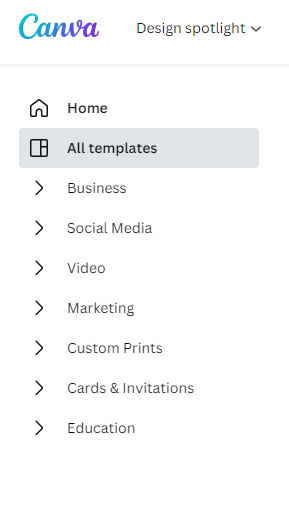
The “All Templates” section will expand to reveal different options, including Social Media, Video, Business, Marketing, and others. Click on the Social Media option, and it’ll take you to the page containing all the social media templates. Since we’re creating a social media post, you can pick the relevant platform from the Social Media section (let’s proceed with Instagram Posts).
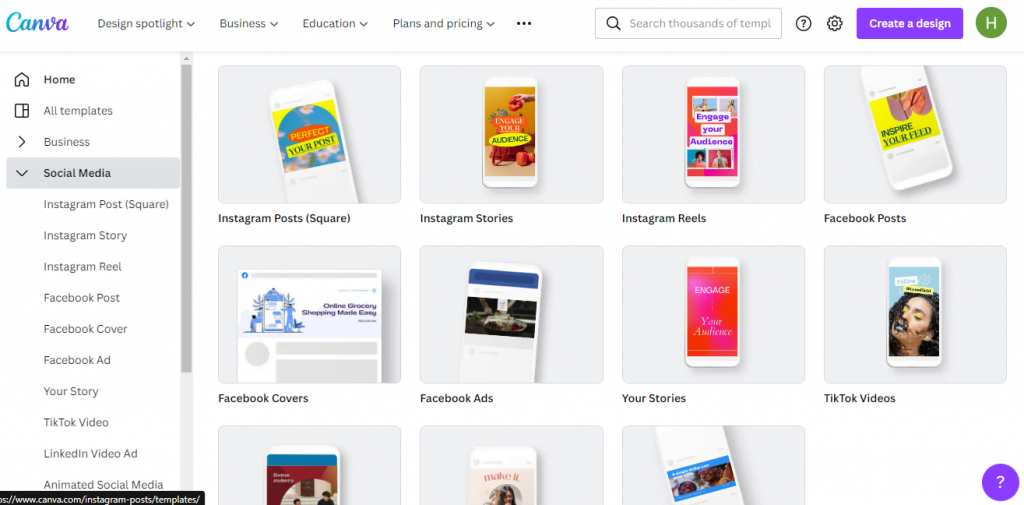
Step 3: Editing the Template
You can also build a social media post from the scratch by selecting “Create a Blank Instagram Post”.
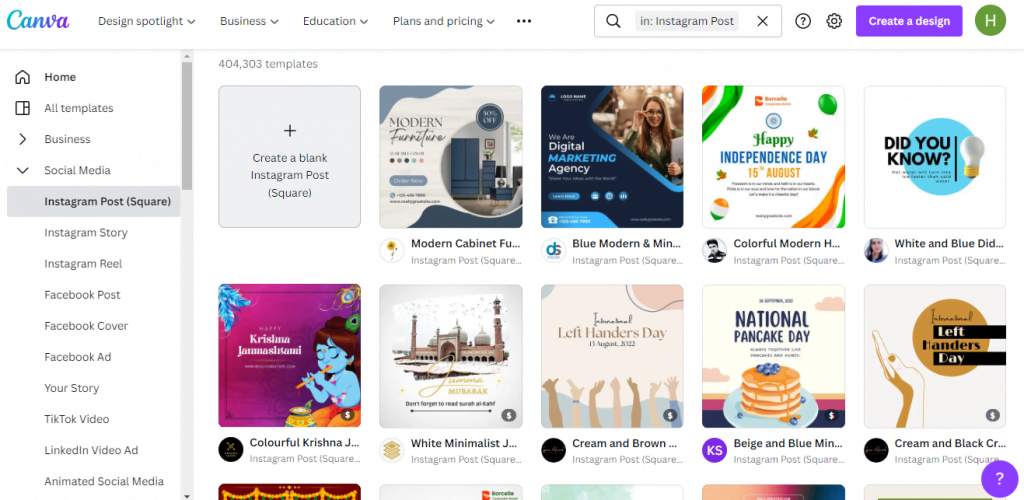
However, we’ll proceed with editing the pre-designed template. Pick your required template and click “Customize this Template.” It’ll take you to a new window with the editing bar with several options on the left and your just-selected template on the right. For downloading, click “Share” on the top right of the screen. But let’s leave that for later.
Step 4: Using the Editing Elements
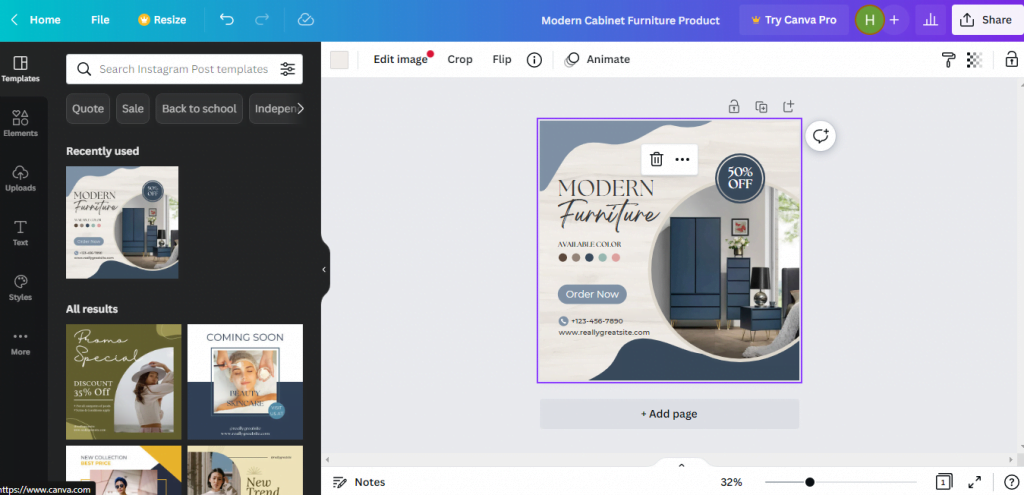
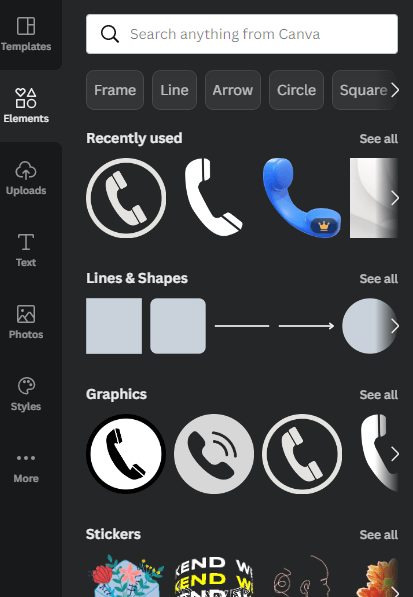
Select the “Elements” option to edit the images, text, graphics, and colors. You can delete any of these elements and add new ones by just hitting the delete button. You can even duplicate the elements in the options available when you hover over each individual element on the template.
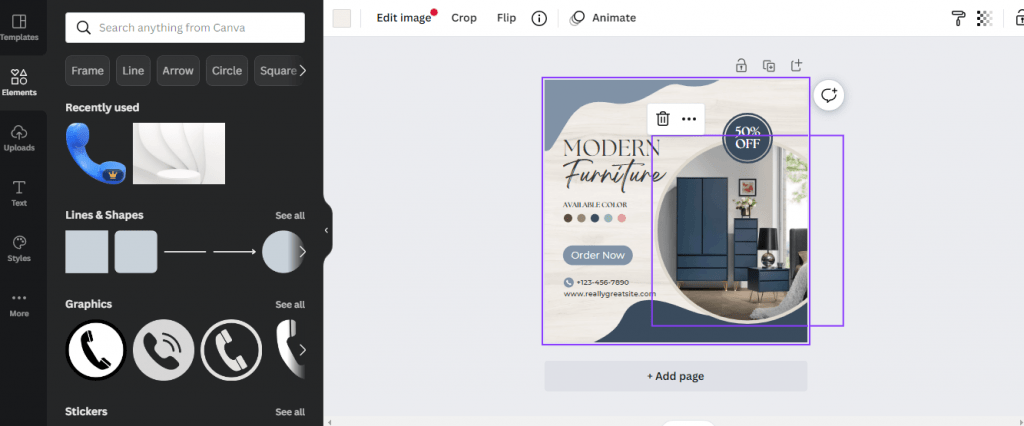
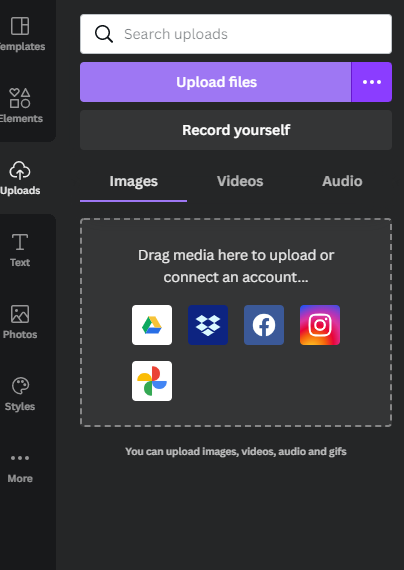
To add new photos that Canva suggests you readily, select the “photos” option from the editing bar on the left and pick out your favorite one. You can also select the “upload” option if you choose to upload a new photo from your device. You can also add a new photo from your device’s cloud storage, Google Drive, or social media accounts.
Step 5: Changing the Text Element
Back to the elements section, where you hover over the text you want to replace, double-click it, and it gets highlighted. Now it’s ready for editing.
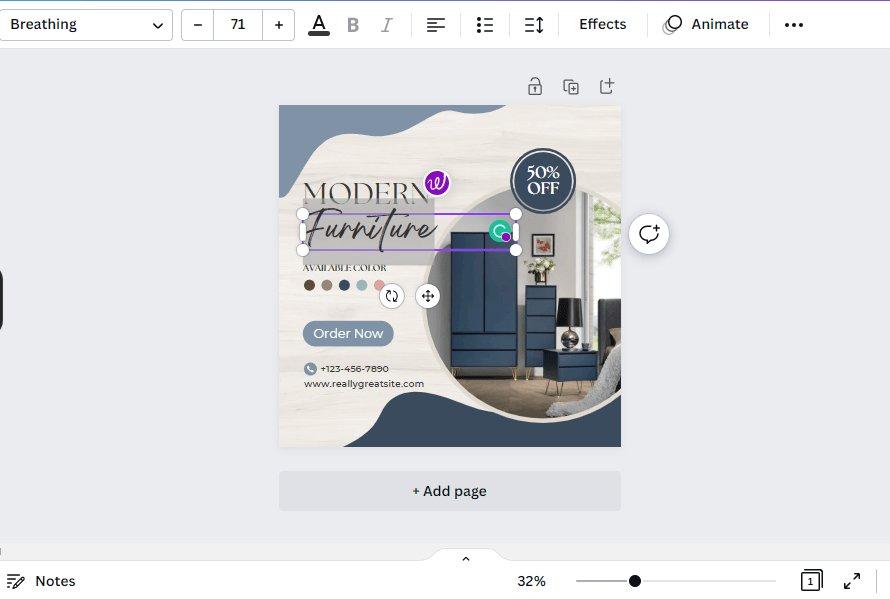
You can see the options to edit the font style, size, color, alignment, format, effects, and animations at the editing menu at the top. Explore each option and make changes just the way you want! Whether it’s the Canva logo that you want to change or the text within the template, it’s all simple and easy.
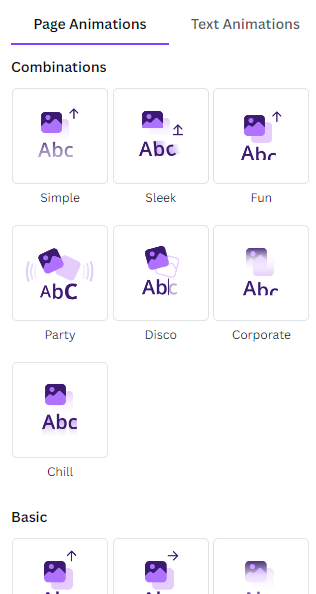
One particular that I personally find interesting in the “animate” section is the page animation option, aside from the text animation. Simply select page animation and discover several animations to how the text appears on your page, all for free! It’s flabbergasting.
Furthermore, the three dots on the extreme left of the menu bar reveal further text editing options such as text position, upper-lower cases, underlining, transparency, and more. They are just never-ending and worth exploring!
From the elements section, you have the option to add some cool icons, shapes, and symbols. Can readily offer you relevant shapes so that you don’t have to dig deep into stamping the relevancy. You can place, position, resize, reshape, recolor, or basically do whatever you find fun or interesting with these symbols.
Step 6: Finalizing and Downloading
Once you’re done playing around with your selected template, it’s time to finalize it. And when you’re done with that, let’s download it and title yourself as a graphic designer pro! Find the share option in the top right corner, click it, and select download.
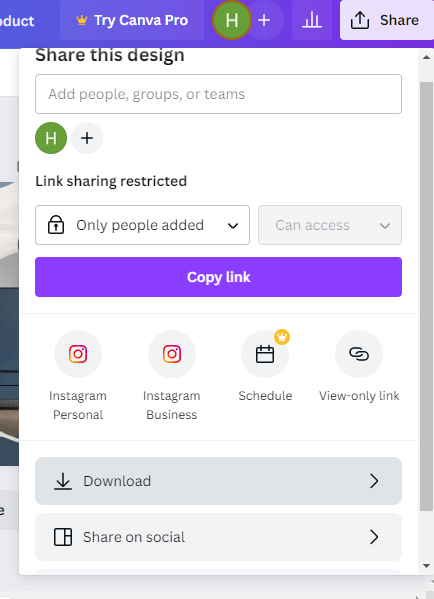
For downloading, you have several options for the image format, including JPG, PNG, PDF, GIF, and others. A couple of other editing options are also available, but they’re restricted for Canva pro users, but we bet you won’t be needing them for now either.
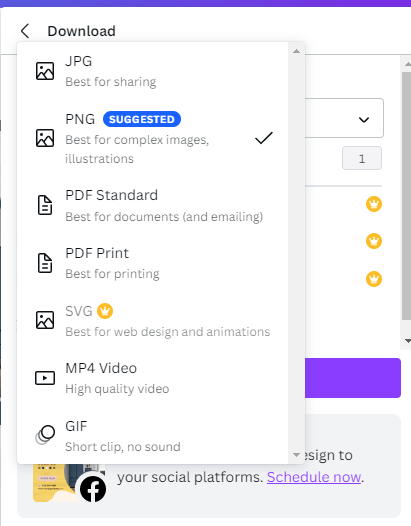
Click on the download, select the location, and there you go! That’s how simple, quick, efficient, and free it is to design a social media post from a template.
Canva for Education
Aside from creating catchy designs from the scratch and updating the ready-to-use templates, you can use Canva for education as well. However, for now, Canva is available only for K 12 standards which includes the primary level of education. But owing to the pace Canva is rising at, we can expect quick upgrades in this regard as well.
The Canva design version at the moment allows you to create presentations, amazing designs, infographics, data charts, sheets, graphs, book & thesis covers, and more, thanks to its easy-to-use interface. The only point of concern is that you need to apply for Canva for education as a teacher.
Make sure the educational institute where you teach is accredited by the Government. You can also apply and get registered if you’re a Google Certified Educator. Here’s how Canva for education assists explicitly you in teaching:
- Make Your Lesson Plans: With Canva for Education, you can create your own lesson plans to not only impart knowledge in a better way but also to organize your daily lesson routine.
- Make Learning Plans for Students: You can also create learning plans for the students by synchronizing them with your lesson plans.
- Presentations & Infographics: Create awesome presentations and infographics from the ready-to-use templates. With Canva for Education, you can also edit videos for better visualization of your lesson.
Canva for Blogging
Yet another awesome & easy to use feature is Canva for Blogging. This isn’t essentially a separate feature. Instead, it’s an idea to use Canva templates and design options for your blog. With Canva for blogging, you can:
- Create catchy featured images for blog banners.
- Quote graphics using a variety of fonts, quote styles, and text colors.
- Create engaging infographics to understand an intricate concept with concision.
- Design wonderful animations for an excellent user experience.
How Much is Canva Pro: Features and Pricing
We have extensively covered the features of Canva design for free, which should be good enough for you if you need graphics anywhere. But you might be wondering what unravels once you get access to Canva Pro. Let us curate your concerns down here:
- Lifetime access to around 500,000 templates (and still counting).
- Unlimited access to more than 80 million premium & royalty-free stock images, audio, videos, and a lot more.
- Get 100GB of cloud storage which should be more than enough for your stock designs for a lifetime.
- With Canva pro, you can impart your creativity to others as well. Create and upload your own fonts, styles, and color schemes – design your own brand kit on Canva.
- Get access to the magic resizes tool for altering an image according to the requirements of social media platforms. Create perfectly sized Facebook, Twitter & Instagram posts through a couple of clicks.
As for the question, How much is Canva Pro? Well, Canva has a range of plans for the individual as well as business use. So, explore the pro-plans and find the best fit right away!


